My guest is requesting an invoice, what do I need to do?
If a guest asks for an invoice or receipt, you, as the host, are responsible for providing it. Holidu cannot issue invoices to guests because we are not the legal provider of the accommodation. We only issue commission invoices to you, the host or property manager. You can create guest invoices quickly with the Guest Invoice Tool in your Holidu account.
Why do I need to issue an invoice?
Holidu facilitates the payment between the guest and you. We deduct our commission before your payout, but legally you remain the service provider. That means you are responsible for issuing the invoice or receipt to your guest.
Important points:
- Invoices must reflect the full amount paid by the guest, including Holidu's commission.
- You can prepare a draft at any time, but invoices should be issued from the day of check-in.
- Invoices become available in the tool after the guest checks out.
- Local tax rules may differ. If you are unsure, check with a tax advisor.
Am I legally required to issue invoices?
In most countries, yes. Hosts are generally required to provide guests with an invoice or receipt for their stay. Because Holidu only facilitates payment and is not the legal provider of the accommodation, you remain fully responsible for invoicing.
Professional hosts with a valid VAT number must issue an invoice at the end of each stay, even if the guest does not ask for one. This supports compliance with local tax and accounting rules.
Note for properties in the Canary Islands (Spain only)
If your property is located in the Canary Islands, mainland Spanish VAT (IVA) does not apply. Instead, the local indirect tax IGIC applies. Invoices for these properties should not include IVA and must follow IGIC rules.
What is the Guest Invoice Tool?
The Guest Invoice Tool is a self-service feature in your Holidu host account. It helps you create invoices for your guests directly from each confirmed booking.
Key features:
- Self-service invoice creation: Generate, edit, and issue invoices for each confirmed booking.
- Flexible workflow: Start with a draft, review the details, and issue when you are ready.
- Extra services: Create additional invoices for add-ons such as meals, transfers, or e-bikes.
Please note: Once an invoice is issued, it cannot be edited or amended. If you are unsure, choose Save and Close to keep it as a draft. Selecting Save and Issue makes the invoice final. To correct an error, cancel the invoice and issue a new one.
Where to find the Guest Invoice Tool
You can access the Guest Invoice Tool in two ways.
Option 1: From the Financial tab
- Log in to your Holidu account. If you manage multiple properties, select the property linked to the booking.
- Go to the Financial tab on the left-hand side.
- Select Guest Invoices.
Option 2: From the booking
- Log in to your Holidu account. If you manage multiple properties, select the property linked to the booking.
- Go to the Booking tab on the left-hand side and select the booking you want to invoice.
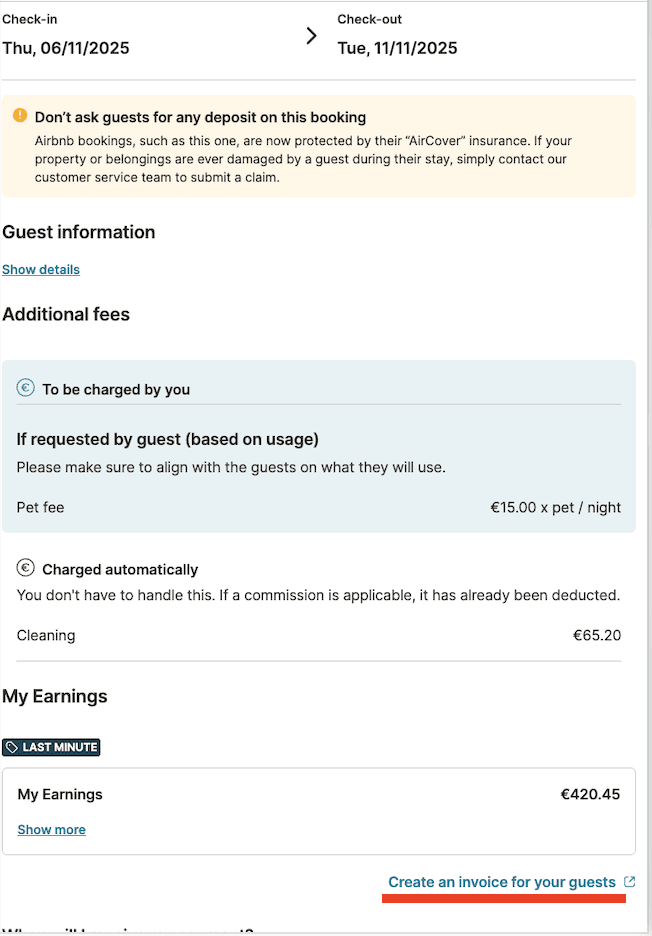
- Under My Earnings, click Create an invoice for your guests.
How to configure your guest invoice settings
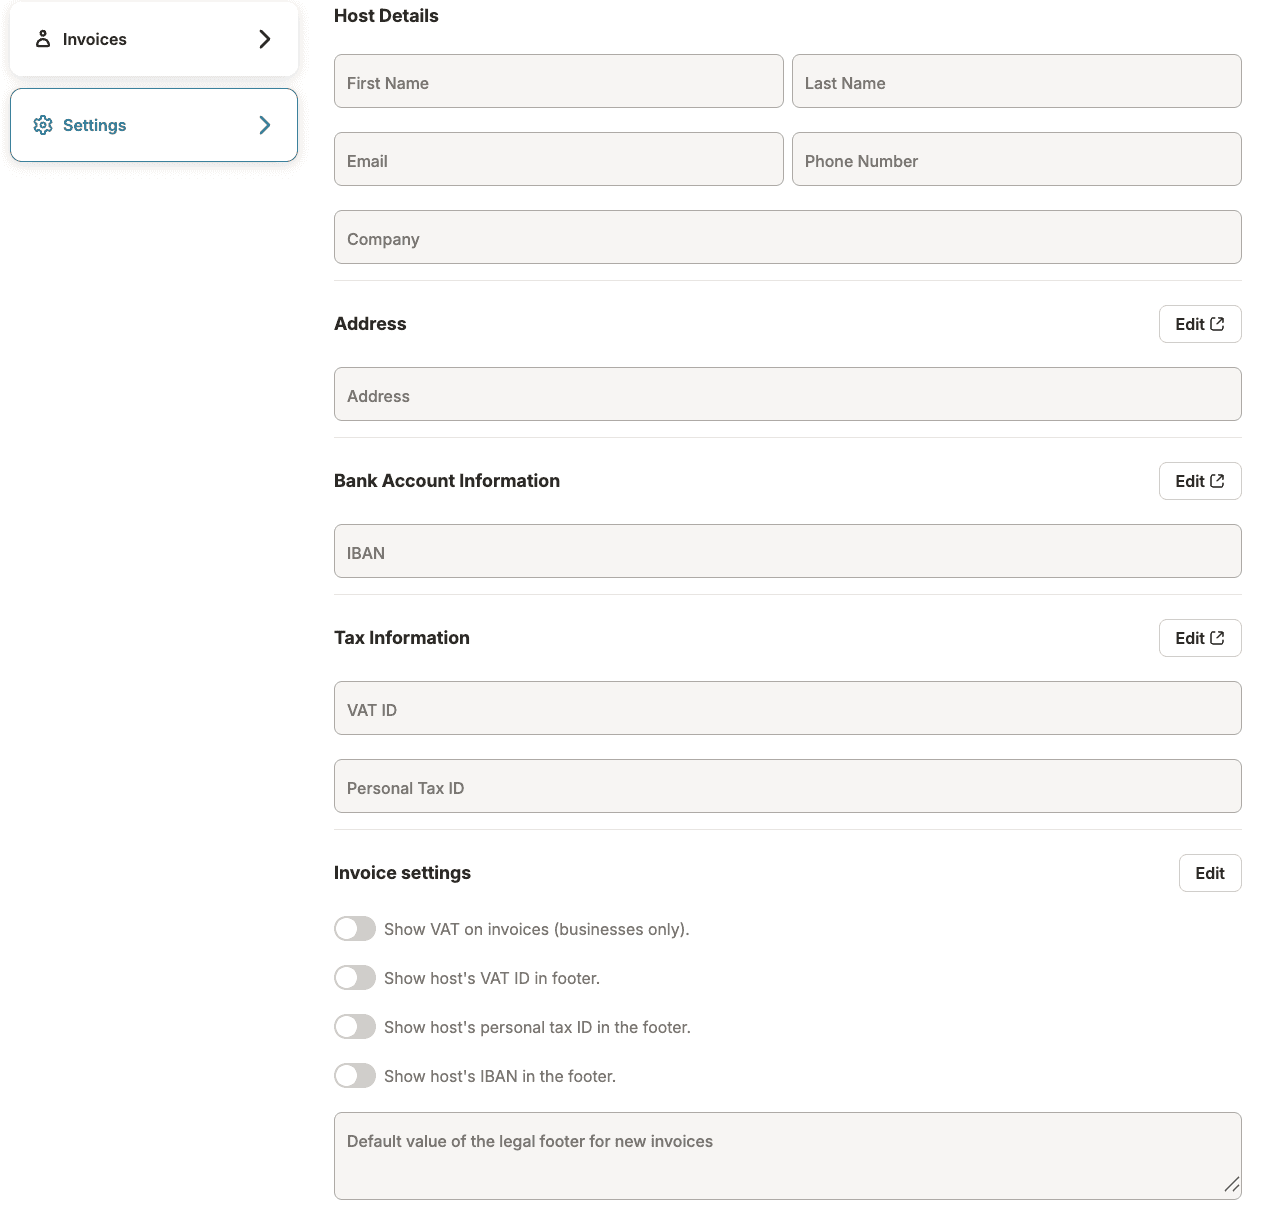
To keep your invoices professional and compliant, check your details in the Settings section of your dashboard before you create your first invoice.
Update your host and business profile
Your contact and legal details appear on every invoice, so make sure they are accurate.
- Host details: Check that your name, email, and company name are correct.
- Address: Use your legal business or primary residence address. Click Edit to update the street, postal code, and city.
Customize invoice display settings
You can control what guests see on their invoices in Invoice settings:
- Show VAT: Turn this on if you are a registered business that needs to display VAT on invoices.
- Footer details: Choose whether to show or hide your VAT ID, Personal Tax ID, or IBAN in the footer.
- Legal footer text: Add a custom message, such as a thank-you note or a legal disclaimer required in your region.
Choose which business issues the invoice
If you manage properties under more than one business, for example as an owner who also runs a separate company, or when a management company handles the property for you, you can choose which business issues each invoice.
- Holidu automatically selects the business that applies to each booking.
- If it is not correct, change it before you issue the invoice.
- To manage profiles, go to Settings > Invoices. You can add, rename, edit, or delete a profile at any time.
- If you edit invoice details by hand and they do not match a saved profile, you can save them as a new profile for next time.
- Each profile keeps its own invoice numbering and warns you before a duplicate number is used.
Step by step: create the invoice
- Select booking details: Choose the booking ID and the preferred language. Holidu selects the issuing business automatically, but you can change it here.
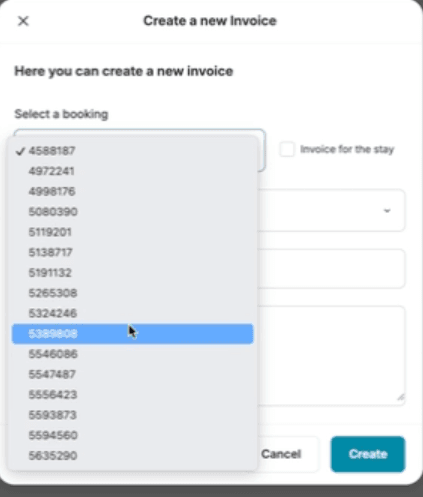
- Add guest information: Enter the guest's billing address and VAT ID, if applicable.
- Review and customize: The system fills in booking details such as dates, property name, and total amount. You can add a personalized message in the Legal Footer, and it will appear on the invoice.
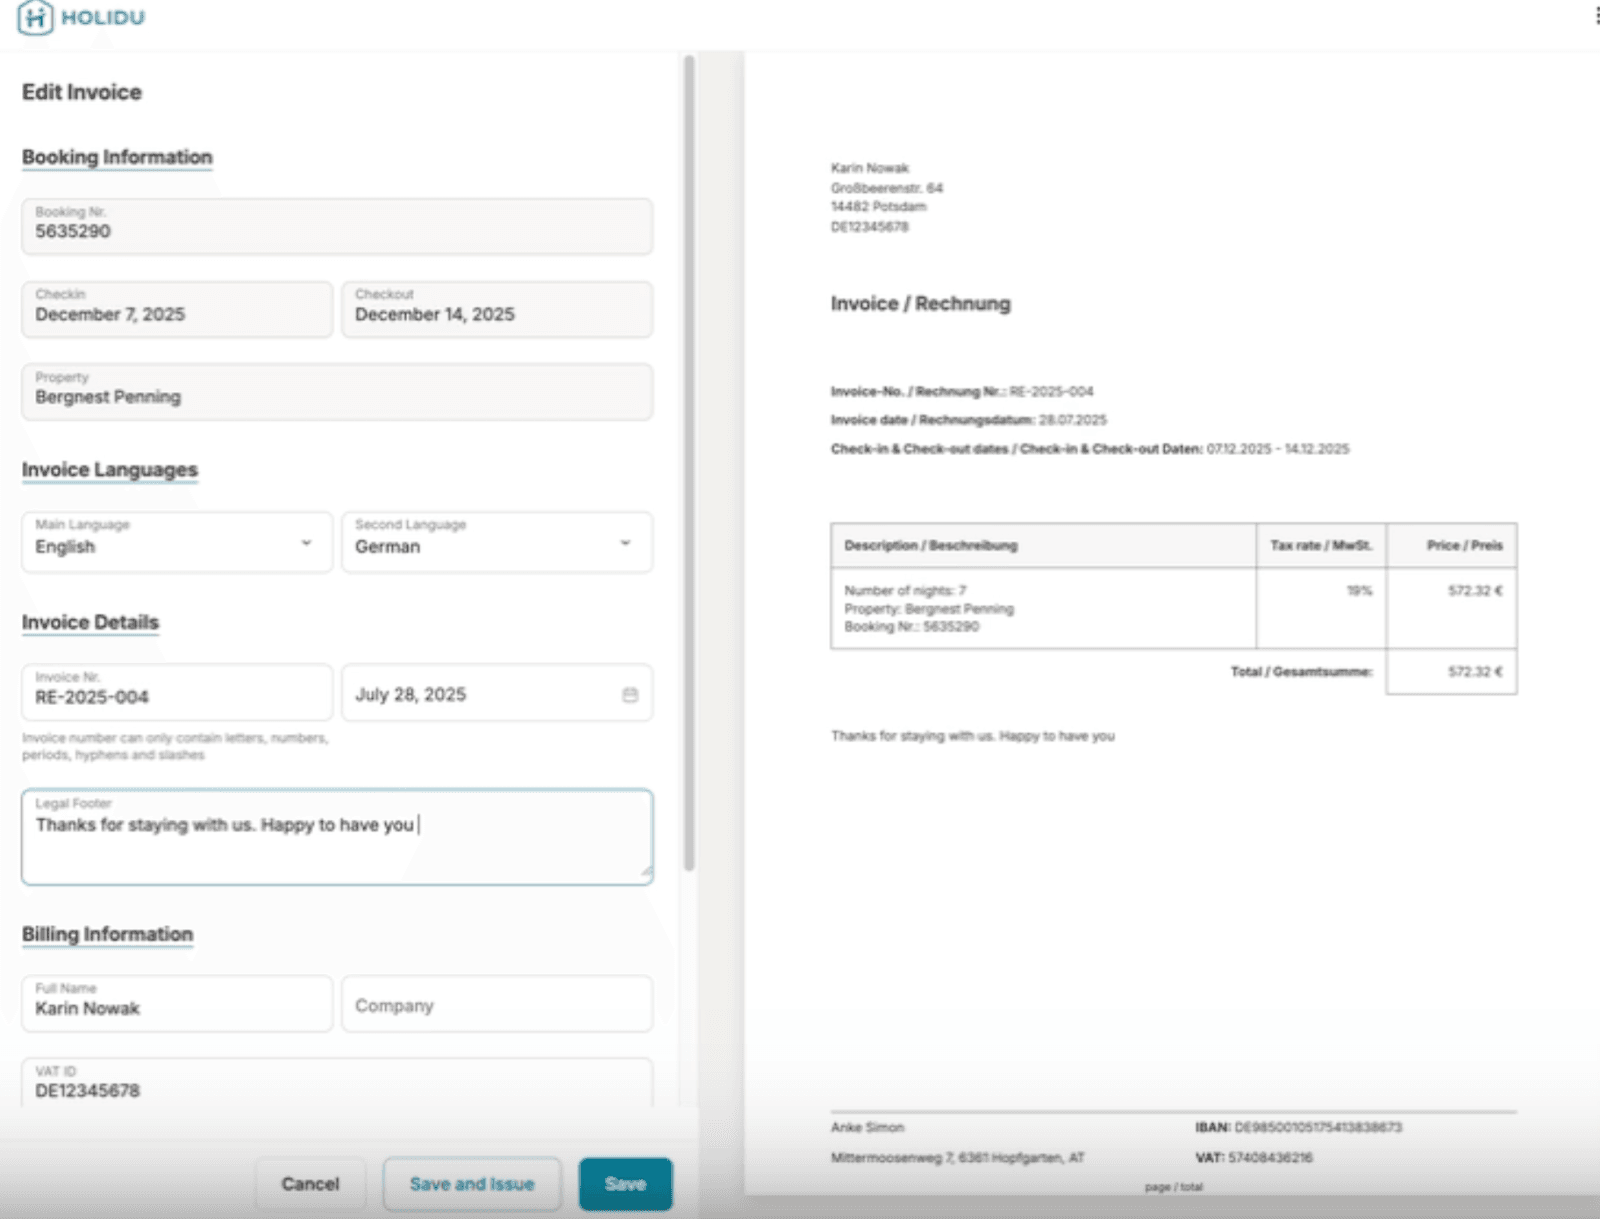
- Save or issue: Choose Save and Close to keep a draft, or Save and Issue to make the invoice final.
How to automate your workflow
To save time, prepare drafts as soon as a booking is confirmed. Holidu sends you an email reminder if a draft is still waiting after the guest has checked out, so you can issue it on time.
Invoicing for extras
If your guest pays for extras such as meals, transfers, or e-bike rental, create an additional invoice. Select the Additional Invoice option in the Guest Invoice Tool and enter the extra services and amounts.</
Do you want to contact us?
We’re here to help. You can contact us directly if you need assistance or have questions.
Contact us